How to improve the quality of your artwork scans in Photoshop
 Using the linear burn feature in the layers palette for better definition.

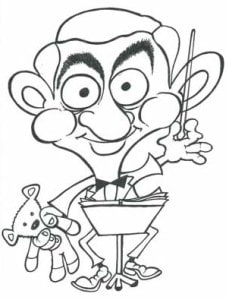
I often produce the black and white stage of my cartoons on paper and then scan into the computer to finish off the refining and coloring on the graphics tablet. The problem with the scan is that it is never a solid black and there are plenty of imperfections picked up by the scanner which all require solving. For this post I am going to show you a quick and easy way to ensure the base cartoon is a sharp black.
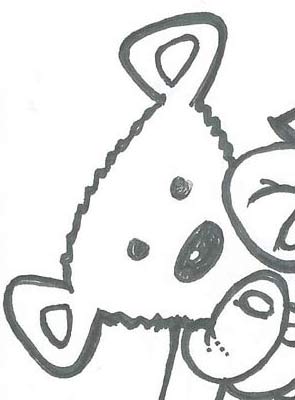 You can see that the cartoon scan is slightly washed out and not really the sharp black that is needed. When I zoom into the bear you get a better feel for the problem with the initial scan. Although I scanned in at the recommended 300dpi (dots per inch – which is the general printing industry standard) the scanner shows that the image was not pure black. Pretty weak in fact and I need it to be solid black.
This is easy to fix in photoshop. First you open the image file into photoshop (applies to any version of Photoshop or Photoshop Elements).
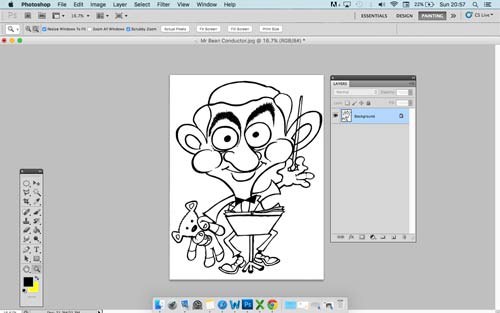
You can see the layers pallet to the right of the cartoon. If it has not appeared click on the ‘windows’ tab at the top of the screen and click ‘layers’ to activate the layers pallet.
 Next you need to duplicate the image. On the layers pallet right click on the layer indicated ‘background’ and then click ‘duplicate’
 This will duplicate the original layer and as you can see there are now two identical layers in the layers pallet with the same cartoon image. What we are going to do is to use the color properties in each layer to create a much sharper image.
 At the top left of the layers pallet is a drop down menu that you can activate.
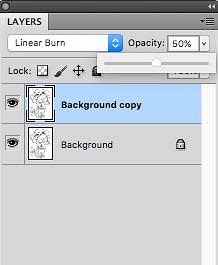
Select linear burn from the Photoshop layers menu (located on the drop down menu on the top left of the layers pallet). This will have the effect of making the image a solid black. Linear burn reduces brightness and darkens the base color in this case intensifying the black. I actually think that 100% linear burn is too harsh and I reduce the effect by lowering the opacity from 100% too 50% using the opacity slider (located on the top right hand side of the Photoshop layers pallet).
The last part of this stage is to merge the two layers together. This again is easily done by opening the layers menu at the top of the page and selecting either ‘flatten’ or ‘merge’
 You now have a crisp image in a solid black. This is not the end of the refining process as there are always scanning imperfections on the image that need to be removed.
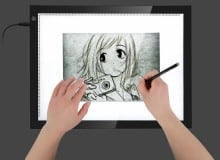
If you are new to digital art or are considering buying a graphics drawing tablet take a look at my comprehensive reviews of a full range of available tablets right here…