Adding layers in Photoshop to create light and shade
Years ago cartoonists had to add a thin adhesive film of tiny black dots to their black and white art work to get uniform shading. This was tedious work but necessary for the cartoon to be reproduced in news print. Adding layers in photoshop to create a shading effect is a much easier option but it is still interesting to see how it used to be done.
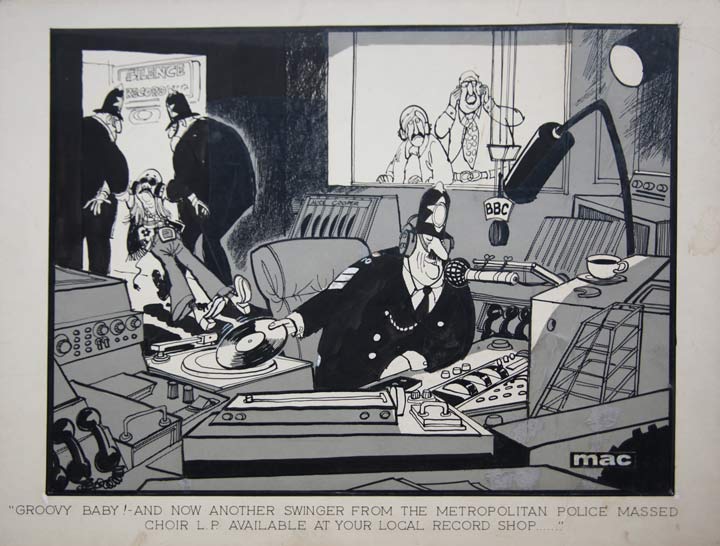
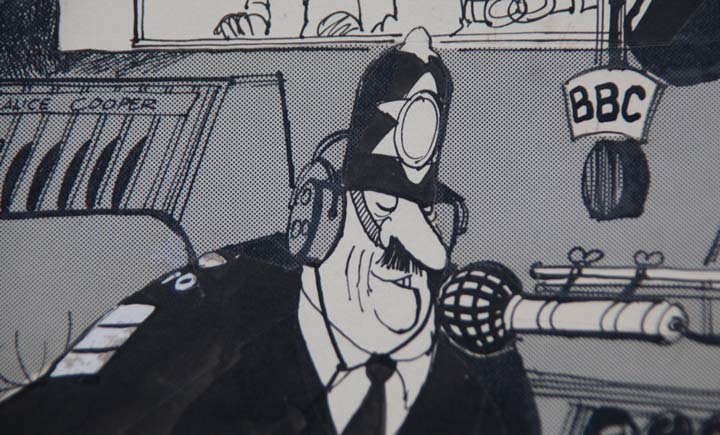
Here is a great example of a cartoon by British cartoonist ‘MAC’. This is an original cartoon that I am lucky enough to own – so you will be able to see how MAC created the grey shading. When you look really closely you can see the preprinted film which had to be cut, overlaid and stuck to the original cartoon surface.
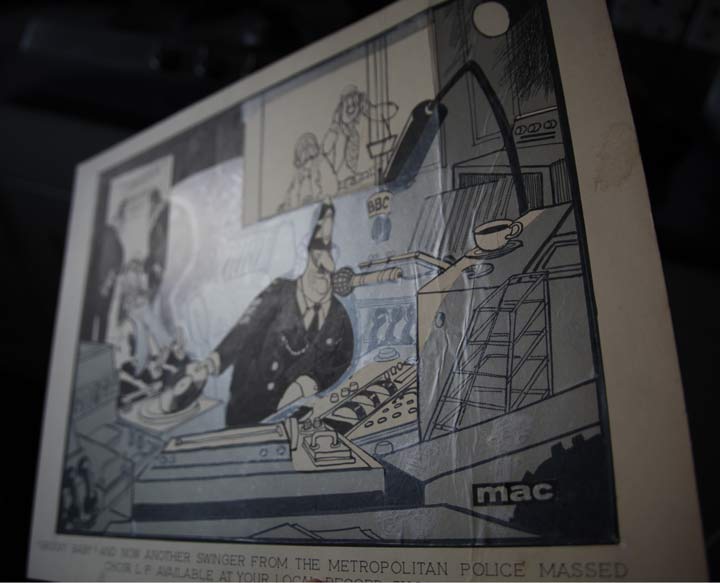
This process can be seen more clearly when you look at the surface of the cartoon from an angle. The sheen on the plastic shows the extent of the overlay and the amount of careful cutting usually with a scalpel/ craft knife.
It is very effective and reproduces really well when used as a print or for a newspaper. However I think you will agree that it is a lot of work and frought with danger. One false move and hours of original work can go down the swannee!
Electronically create a grey shade in photoshop
Thankfully it is a different story these days and shading can be created quickly and easily with graphics software such as Photoshop and Sketchbook Pro.
In the following example I am using Photoshop CS5. This is the full version of Photoshop albeit not the latest version on the market. However the principle holds good for all versions including Photoshop Elements.
Scan/ open the image into Photoshop
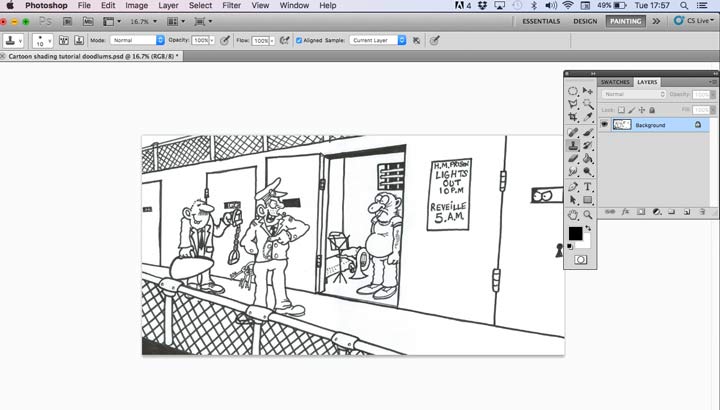
First scan and open the black and white cartoon into Photoshop. You will note that the layers and tool pallets are active in this example. When you open an image into Photoshop it creates a Background layer in the layers pallet.
How to show layers in Photoshop if they are not on screen?
If the layers pallete is not visible on the screen or you accidently close it you can find it on the ‘window’ tab on the top menu bar).
How to copy a layer in Photoshop
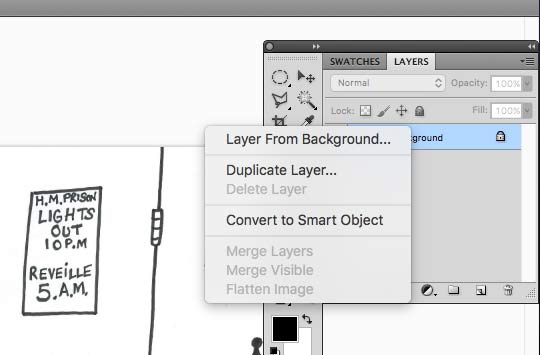 I always keep the Background layer ‘sterile’ (I don’t do any work on it). This allows a safety net if something goes wrong that would be difficult to undo. The first job is to duplicate the background image – right click the Background layer in the layers pallet and select Duplicate layer.
This creates an identical image that will be used to work on.
 How to add a new layer in photoshop to create a shade and white layer
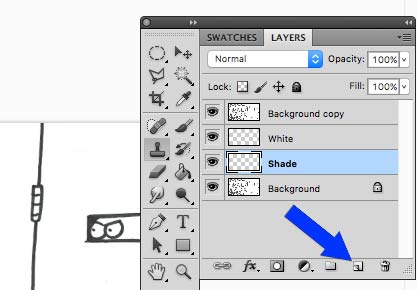
Use the Create a new layer icon (indicated by the blue arrow) and create two new layers.
Label them Shade and White by clicking on each layer label in the layers pallete, which will allow you to add text.
You can rearrange the order of the layers by clicking on them individually and dragging them up or down.
 De-activate the original background image
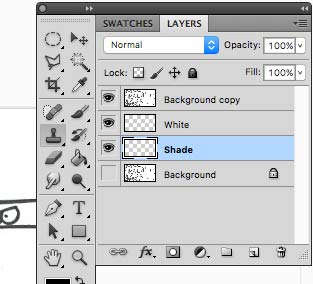
Click on the eye icon to the left of the Background layer.
This will deactivate the layer so it will not be visible on screen while you are working on the cartoon.
You can see the eye icon has disappeared indicated it has been de-activated.
Remove all white space on the ‘background copy layer’
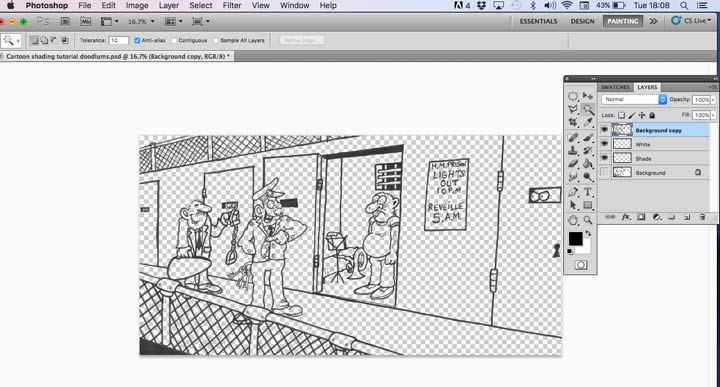
The only image visible on screen is the Background copy layer. To be able to create the shadow effects you need to remove all white areas on this layer.
To do this click on the magic wand tool in the tools pallet.
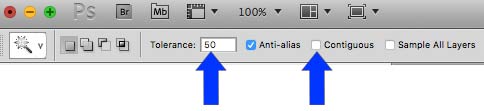
Uncheck Contiguous at the top of the screen and set the Tolerence box to around 50.
Click any white area on the cartoon with the magic wand tool and hit the back space on your keyboard.
This will remove all white (selected by the wand tool) areas leaving only the black cartoon drawing. Layers below the ‘background image’ will now be visible. The transparent areas will appear as very faint grey checks as you can see in the cartoon above.
Fill white and grey layers
The White layer will need to be flood filled with 100% white and the Shade layer flood filled with 25% (opacity) black to provide a medium grey shade.
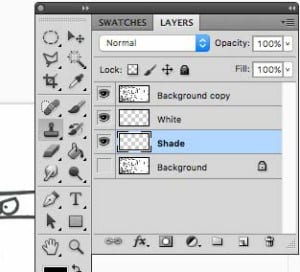
Before you do this the Shade layer needs to be above the White layer. Click on the ‘shade layer’ and drag it above the White layer but keep it below the Background copy layer.
Select the White layer in the layers pallet.
Select the color white in the tools pallete or in the color swatch. The color swatch is available in the main Windows tab at the top of the screen if it is not already displayed on screen.
Make sure that the opacity level is set at 100%

![]() Select the paint bucket tool in the tools pallet and click onto the cartoon image. this will flood fill the White layer with white at 100% opacity.
Select the paint bucket tool in the tools pallet and click onto the cartoon image. this will flood fill the White layer with white at 100% opacity.
Now repeat the last section with the Shade layer but this time select black at 25% opacity.
You should now have four layers in the layers pallet – from top down:
- Backgound Copy with all white removed
- Shading – at 25% black opacity
- White at 100% opacity
- Background (original image) whish has been disabled and cannot be seen
If you have done this correctly you will see the layers in the correct order in the layers pallete with the original Background layer de-activated. It is a great feature as Photoshop shows all layers in the layers pallete even though not all are active.
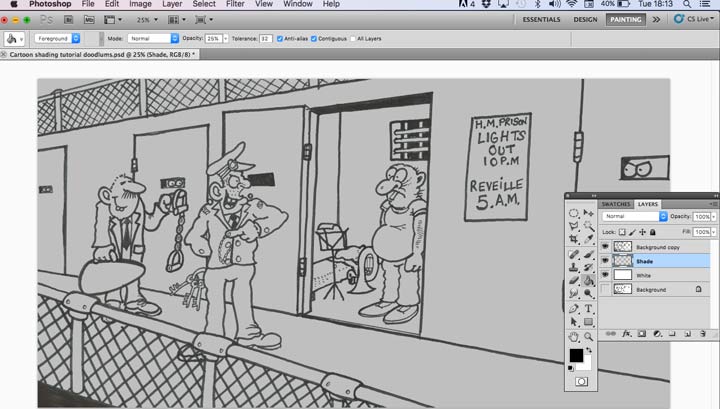
When looking at the cartoon in Photoshop you can only see the top two layers. The original black cartoon without any white areas (which you can see through) and the Shade layer below. The white layer lies below the grey and at this point cannot be seen.
Ok so far?…This was the difficult part – setting up the various layers to get to this stage. Now for the fun part…
Bringing back the light
You are going to erase some of the Shade layer to reveal the White layer below.
Click on the Shade layer in the layers pallete to make it active.
Select the eraser tool on the tool pallete and set the brush as a soft edged brush of 100 pixels and the opacity at 100%
Note: You can alter the eraser brush size up and down with the square bracket keys on your keyboard. Left square bracket reduces the size of the brush/tool and the right square bracket increases the size. I find it difficult to remember every Photoshop shortcut but there are a few that are so helpful that I do use them all the time. This is an invaluable shortcut for many different Photoshop tools and if you were not aware of that I would strongly advise that you try it.

![]() You can now start to delete areas of shadow to expose the ‘light’ (White layer below).
You can now start to delete areas of shadow to expose the ‘light’ (White layer below).
In the cartoon I wanted to show the prisoners cell lit up so everthing behind the prisoner was deleted from the Shadow layer.
With careful manipulation of the erasor brush (don’t forget to use the square brackets on the computer keyboard to quickly change the eraser brush diameter) you can remove portions of the shade layer even in some very tight corners.
Don’t forget if you make any mistakes you can Edit/ Undo which is one of my favourite features – Photoshop is so forgiving when you do something wrong.
The rest of the deleted areas are where I thought the light spilling out from the cell would give the illusion the best effect. Edges of the prison warden and the prison govenor, plus small areas of the railings and the back of the prisoners head all give the illusion of light and shade.

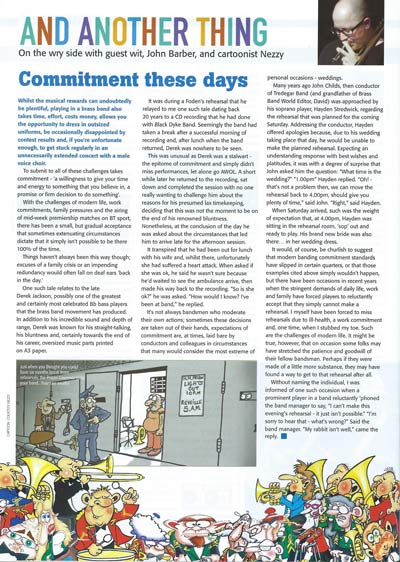 The cartoon was used in Brass Band World Magazine in the May 2016 edition. I added a small amount of color to the characters to get it them to stand out a bit more. If you look at the page in the magazine you can see that some of the cartoon has been cropped.
This might seem like a slap in the face for me as it took time and effort to draw the cartoon. However, it is a fact of life that publications using cartoons often have limited space and any ‘unecessary areas’ have to be trimmed to the optimum.
I fully understand that and respect the editorial decisions as space is money and money is needed to keep any magazine running. I thought I would share that with you so if it happens to you it wont be a shock that has you gnashing your teeth!
There you have it. A few tips that you can apply to a lot of other projects simply by adding layers in Photoshop. An easy way to create light and shade without spending hours of manual work!
 Related Posts
Using Photoshop layers to scan in larger images.
How to improve the quality of your black and white scans in Photoshop