Making prints of your art to sell – how to present and package

There are several avenues for selling your artwork as art can be applied to a multitude of products. Making prints of your art and original artwork to sell can be very rewarding and lucrative. Packaging your artwork in a ‘picture mat‘ (also known as a ‘picture mount‘ – european terminology) creates a polished and professional look. There is no best way to sell arwork but with great preparation and presentation you can give yourself a head start.
If you have been wondering ‘how to sell my artwork’ online or offline there are many avenues open to you. For basic printing or creating art on paper there are three main options:
- Original artwork
- Limited edition prints
- Prints
Original artwork
 This is by far the most profitable of the three as original artwork is a one off and you can ask a much higher price for it.
However the downside is that you can’t ‘rinse and repeat’ this one easily and it can be labour intensive.
On saying that I have made a fair amount of money from original artwork and there is a certain Kudos and satisfaction about selling your original art.
Limited edition Prints
 A limited edition print is a print run of the same print but limited to a certain number of prints typically in runs of 50, 100 or 500. This makes the print ‘special’ because it creates limited availability and value to the purchaser and seller alike.
This can also be rewarding but only really works if you are either a well known artist or have cornered a niche with willing customers.
When there are willing customers this too can be quite profitable and unlike original artwork it is only limited by the number in the limited edition run.
You can also charge a higher premium because of the perceived ‘limited’ scarcity.
Where to place the limited edition number, signature and caption or title
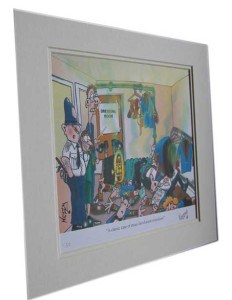
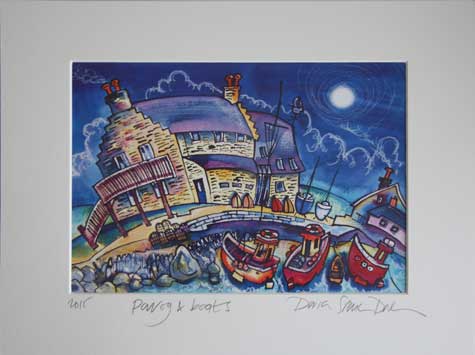
The limited ‘run’ is normally indicated in pencil such as the example shown (1 of 50, 2 of 50 etc…). I also hand sign each individual print on the bottom right. most of my cartoons will have a caption which fits in between the limited edition number and my signature which balances reasonably well on the eye (you may be thinking of adding a title for the art).
 I have seen other artists sign and add the limited edition number on the picture mount itself. There is no hard and fast rule.
The only consideration to make when adding the limited edition number, title and signature to the picture mat is that it willeventually be put into a frame so you don’t want any added text too close to the edge ofr it may be partly lost behind the frame.
In the example shown above, by Welsh Artist Dorian Spencer Davies, the print title, year of creation and artists signature are all pencilled on the picture mat. In this case it really adds a ‘flourish’ to the artwork.
Prints
Possibly the most difficult to sell as they are not original artwork or scarce by limitation. however on the plus side there is no limit to the number you can sell of any one design.
Produce your art packaging in house or outsource?
Original artwork is produced in house but there is the dilemma of getting your work mounted in a picture mat and packaged. As original artwork can attract a much higher price it may well be to your advantage to get it put together professionally.
The advantage with outsourcing the mat and backboard is you can create the artwork in what size you like and then get the mat to fit/ cut by the supplier who assembles it. The other advantage is you don’t have to do it yourself!
On the down side it can take time and can be expensive. You are also relying on the person putting your precious artwork into a mat to do a good job. Here’s my personal experience of outsourcing that didn’t quite go to plan…
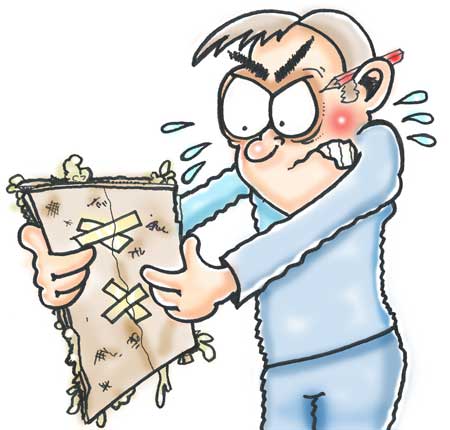 Picture mat outsourcing horror story!
I once took one large water color original cartoon that I had created to a local art framer who I had not used before (fatal mistake!). I had already sold the cartoon online and was getting it ready for shipping. I asked the framer to put it into a double picture mat and cello wrap.
I returned the next day to collect and it was a disaster as the finish was diabolical. The picture mat had been hand cut badly (possibly with a chain saw!). The mat was not the same size as the backing board, had creases and did not have 90o corners. There were rough pencil marks on the front and solidified glue bulging out of every orifice. The cello wrap looked fine from the front but was stuck with carpet tape on the back!
I was reliably informed by the picture framer that “it will look ok when it’s framed!!! ” At this point I could feel my thumbs twitching as I strarted imagine them around the framers throat!
It was a total mess and was unsellable. After paying another framer to unpick the disaster and make good for around five times the price I eventually got the cartoon to a condition I was reasonably happy to send to my customer.
If you are a true artist you will know exactly what ‘reasonably happy’ means. I still made a profit on the sale and learned a huge lesson which was to either get it done with the best framer I could find (even if it cost over the odds) or do it myself.
I decided that DIY was the only option for me. If you do intend to outsource try it out first with a piece of artwork that you won’t feel suicidal over if it goes wrong and avoid the temptation of potential murder!
What do you need to buy to be able to create your own mount presentation packaging?
The initial outlay isn’t too expensive and once you have purchased your supplies they will generally last quite a while – depending on sales volume. If you are selling quite a lot of your artwork then the price of raw materials should become insignificant.
Before rushing out to buy a bundle of mounts take a good hard think about what you want in terms of finish and size.
Size of artwork
You get the best deal by buying picture mats and backing boards in bulk. I usually buy mine in boxes of 250 and have them custom cut to the precise size that I want. When I first started it was in smaller quantities as I wasn’t sure how sales would go.
Just remember that when you buy pre-cut mats you are constrained to a certain artwork size for original artwork. With prints it is possible to produce the original larger and digitally resize to fit your pring mat stock.
You also need to think about printing process. If you are using a standard printer it will only print up to a certain size. If you are producing your own prints then this is important as it will dictate the opening size in the mount. Heres an example of my standard print and mount sizing. This size allows me to use an A4 color printer and still maintain a print in mat that is a decent size for the customer.
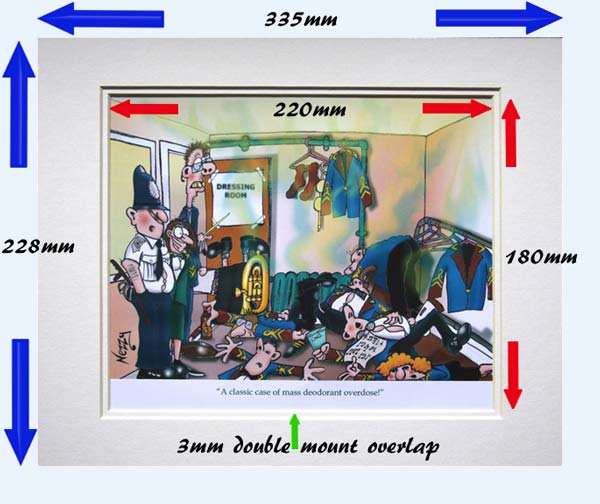
The outer mat size is 335mm x 228 which is a standard frame size (12″ x 10″) in the European market where I sell brass band cartoons. However European and US standard frame sizes vary.
Why standard sizing matters
Why is a standard size mat important? Because it is much easier for your potential customers to get an ‘off the shelf’ frame to fit the mount. If they had to get a custom size frame the cost and hassle is greater for them. Make it as simple as possible for your customers don’t put obstacles in the way of a buying decision.
The first decisions you need to make are:
- Choose a print size (aperture size in the picture mat).
- Chose a standard frame size (external dimension of the mount).
For the US market I would chose a picture mount to fit a standard frame size of either 9″ x 12″ or 10″ x 13″ and an aperture size (print area displayed) of 7.1″ x 8.6″ which is around the same size that I use for the european market. Simply because it’s about the largest size that can be printed on a standard size printer. You can go the extra mile and have your printing outsourced but this ramps up the printing cost.
I do outsource some of my limited edition printing simply because I can get a better finish to the print with a glossy or matt finish or a different paper thickness and texture. You have to shop around as the variation in print charges is considerable. The downside of this is that you have to buy in bulk to make it viable. If you can do your own print on demand it is much more cost effective to start off with.
One point I would make is that you should have a decent printer with good quality ink as there is nothing worse that a great piece of artwork with a sub standard print finish.
Single or double picture mat?
The next choice is a single or double mount. I use a double mount as I feel it has a much better look than a single mount (the example above is a double mount).
If you go for a double picture mat the aperture size for the front mat should be around 3mm larger on all sides of the aperture than the inner mat (see the example above).
You can vary this but I have found that a smaller size loses the impact of the ‘double mat’ appearance and if you go larger it starts to detract from the artwork. That’s my own personal choice and you may think differently!
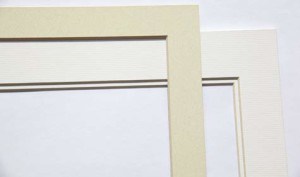
Which picture mat color is best?
I have usually keep to neutral cream on both inner and outer mount. White is ok, black can work as well. However you need to consider the customer and their preferred color scheme where they are going to hang the picture. If you start using oranges and greens you are immediately reducing potential sales. Why? – because you are only going to sell to customers who A – like your artork and B – like your preferred color scheme! Best tip -stick to nuetral to make more sales – artistically boring but economically beneficial.
As your sales increase you can venture into offering picture mat color variations. You can get picture mats where the surface is a different color to the inner core which gives some great effects.
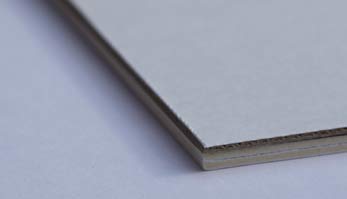
Backing board
Backing board as the name suggests is a light cardboard of composite board the same size as the picture may that is fixed to the back of the mat to seal in the artwork.
You don’t have to fit a backing board. However if you are selling your artwork with a picture mat it would not look good with exposed artwork taped to the back of the mat. I generally use neutral colored backing boards which match the color scheme of the picture mat as I think it looks more professional.
Backing boards are usually sourced from the same suppliers as the mats and are relatively cheap.
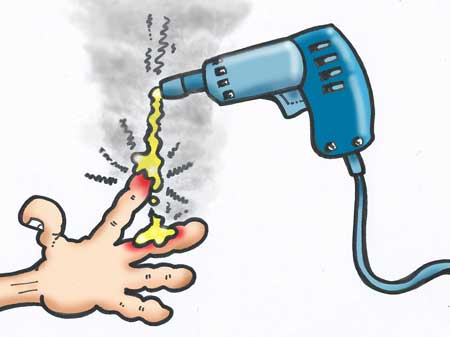 Glue gun vs double sided tape???
You need to secure the picture mat and backing board together. A glue gun is a handy piece of kit. It is basically an electrical device that heats up a polyurethane glue stick till it melts and with a trigger (hence the ‘gun’) that when pulled squeezes molton glue onto the work surface. In this case the backing board and mat.
I used to use a glue gun for setting up my prints but have stopped as I have found a more accurate method. Don’t get me wrong. in the right hands glue guns are superb. however my hands were not quite the right ones to handle such a lethal device!
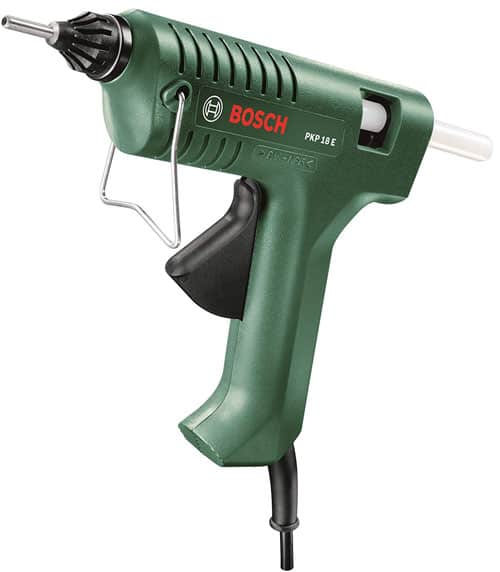
Molton glue burns skin (fact!) and after I had managed to cremate my fingers a few times the doubts about my glue gunning skills came into question. Wyatt Earp I was not! I would have had a very short career as a gunslinger back in the wild west!
The other problem is that glue sets really quickly on the mat and backing boards. You have to work with lightning speed otherwise the result can be a disaster with lumps of glue wedged between mat, backing board and fingers.
After destroying several prints in a sea of molton glue it was time to find an alternative. I am not saying that a glue gun is unsuitable – it just didn’t work well for me but I know plenty of artists and crafters who wouldn’t be without one.
If like me you think you need an alternative I would advise you to use double sided tape as it does not require Eusain Bolt to apply it. Double sided tape doesn’t burn your hands and you can get a really precise and professional finish.
I bought a couple of rolls and took to it like a duck to water. The error rate was virtually eliminated and resulted in a rather smug grin on my face.
One small point – if you opt for a glue gun never use it to join the artwork to the picture mat.
How do you assemble the artwork, picture mat and backing board?
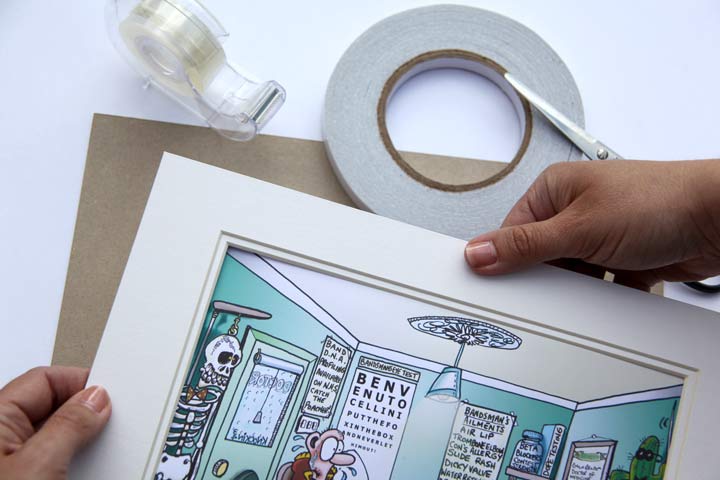
The first thing is to ensure that your artwork has printed off to the correct size so that it fits and displays perfectly in the aperture of the picture mat. In my case I have preset all my prints in digital format to print 2mm large that the aperture to give a small margin to work with when fitting the image and mat together. Cut the artwork so there is at least a one inch border all the way round if possible.
Place a clean piece of paper on the work surface to lay out the pieces. This is simply to keep all the parts clean and dry as a work top will often have little smudges of coffee, dust particles, pet hairs and all sorts of other nasty things that could end up ruining the print. A large sheet of paper keeps the work surface sterile.
 Take a small piece of scotch tape (sellotape) and attach it to the top rear edge with half the tape protruding sticky side up. Repeat this on the bottom edge then lay the artwork flat facing up.
Next place the picture mat carefully over the image so that it fills the aperture and carefully squeeze the two surfaces together to make the scotch tape stick to the mat. I usually cover the mat with another piece of clean paper and press down.
Some framers recommend that only the top side of the print is hinged to allow the print to hang freely. This is said to avoid distortion from temperature and moisture variation. personally I have not found ant problems by attaching the print to the mount on more than one side but you may wish to take this option.
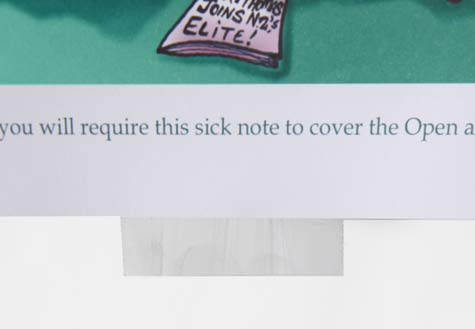
 When the two surfaces and secure turn the print over and start to secure the edges of the print to the mat with double sided tape.
Next add double sided tape to the outer edges of the mount. Keep the double sided tape arount 1-2mm from the edge of the picture mat.
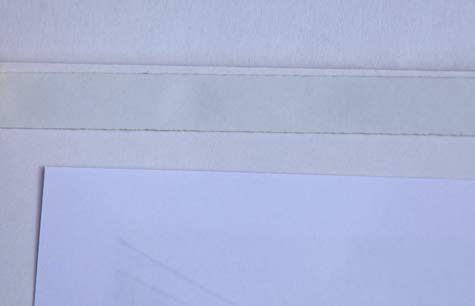
 After removing all backing strips of the tape place the backing board lightly over the mat.
When it is perfectly aligned place a sheet of clean paper over the backing board and press and smooth it down to join the two surfaces together.
If you have done this correctly it will look superb with crisp clean edges!
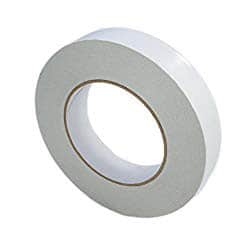
Double sided tape is by far the quicker, cleaner option and requires very little set up time.
A glue gun requires time, skill and you really have to watch what you are doing as you can get fingers burnt and when applied incorrectly you can ruin the artwork.
There are many brands of double sided tape available.
I prefer acid free tape that you can tear by hand as you need both sets of fingers while you are joining artwork, mount matt and backing board together.
Having to put something down to cut the tape with scissors is a little bit fiddly.
Outer packaging
 Cellophane ‘Cello’ bags
For the starter this is the cheapest and easiest way to package the print.
As soon as I have finished constructing the finished print with mat and backing board it goes straight into a cello bag to keep it clean and pristine.
There are other options, such as shrink wrap, but I find cello bags the most cost effective way to present artwork.
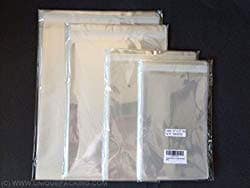
Cello bags are clear you can see every detail of the print, front and back plus any advert or leaflet you want to place in the bag.
How much do Cello bags cost? Because they come in a multitude of sizes and pack volume there is no set answer.
However as an example a set of 100 cello bags on Amazon will cost well under $10 – less than 10 cents a bag.
I usually buy in bulk in a variety of sizes to handle the various size prints and original art that I sell.

How do you package artwork for shipping?
Carefully is the short answer! You can spend a lot of money on packaging and I agonized over this for far too long.
As it turned out there is a simple and effective answer with a cardboard mailer.
What is a cardboard mailer? – it is a shaped piece of cardboard that effectively wraps around the contents (such as a book, document or your artwork) rigidly sealing it in and protecting it from the knocks and bumps during shipping.
I have seen some artists sending prints to customers in padded jiffy bags and plastic envelopes.
My advice is don’t as they bend easily. Get a rigid mailer that gives a good level of protection.
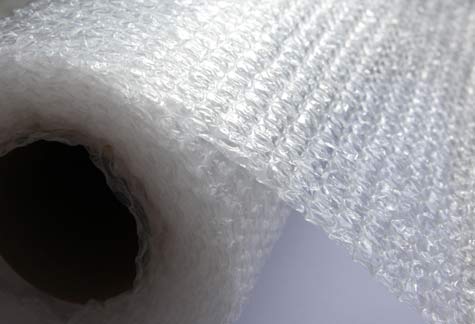
As there is ample space within the mailer I tend to add a layer or two of bubble wrap around the print to give it an added level of protection against the ‘blood and thunder’ of the postal service…or should that be ‘thud and blunder’?
How much do mailers cost? As a rule of thumb you will pay between $1 – $1.50 (£1 – £1.50 for 9″ x 12″ cardboard mailers in small quantities of 25.
I usually buy in larger quantities and the price drops to below $1 (£1)
How much does bubble wrap cost? Again it varies with grade, width and roll length.
As an example 250 feet of 12 inch bubble wrap rolls out at under under t$30/£30.
You could safely wrap a lot of prints with a single roll so the cost is minimal per unit.
If you are thinking of making prints of your art to sell – take action!
It was daunting for me to venture into the unknown – artists are known for their self doubt and I am no exception. However I took the plunge to self assemble, package and sell my artwork and so far I have had nothing but great feedback and have made good money out of it.
The cost of setting this up is not great and there is no real need to buy huge amounts of materials at first. you can test the water with a smaller budget and the rewards from this source of art income can be great both financially and artistically.
This is the way I put together and package my art work and it works for me. Obviously you may find better ways and refinements that are more suited to your particular sphere of art.
Hopefully you have found value in this article and can use it it to get your work out there. Good luck!